


Cut out a pocket template, minus the seam allowance, but including the top section that will be folded over, out of cardboard, using the pattern as a guide. Cut out the pocket (INCLUDING seam allowance :p ) in fabric using the pattern piece.

Finish off the top edge however you want. I just did a quick zigzag, just to contain the loose threads. Run a line of stitching all around the edge, not including the top edge, INSIDE the seam allowance.

Lay your cardboard template over the pocket, and pull the running stitch tight. The seam allowance will pull up and around your template, in the exact shape of the future pocket. Press firmly with the iron, to set in shape.

Remove the template, fold over the top edge, and press again.

Topstitch, however you want.

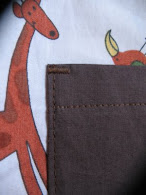
Attach the pocket by lining it up according to the pattern markings, pinning or basting in place, and then stitching around the edge. I like to make a small bartack at the corners, as well, for strength and durability.

Done!!
You can also make a perfect square pocket, too, using a template. Cut out the size you want, and then press the seam allowances over the template, to form the pocket shape, and then follow the rest of the instructions from there. :)
Any questions, let me know!! :D
___________________________________________________________________
Today I am thankful for Skype. :p I just spent over two hours, first webcamming with my sister in Hawaii, and her new baby; and then jumped over to California, to my mom, who was visiting my Grandma, Aunt, Uncle, and their new puppy. How on earth did we get by without it before?? :D


19 comments:
Wow! Thank you! I tried making a round pocket for my childrens aprons and they turned out so wonky, next time I will try the running stitch like you suggested!
found you from crafster by the way...
Great tutorial! Thanks for putting it together! I think I recognize that giraffe and monkey fabric. I've got a small bit hiding in the back of my stash. I used it once in a quilt!
Brilliant! I always wondered how to do this. :)
Thanks so much for this! I have a terrible time with getting pockets right and never thought of doing this.
I am a huge Skype fan as well. When you're in a different country to your family, it makes the world (pardon the pun) of difference!
I always make line my rounded pockets because I wasn't sure how to make them any other way. Thanks so much, I will try it soon!
Ps: thanks for the lovely comments at V&V too!
This is great, I've been making them sans cardboard all this time - can't wait to try one!
This is very simple explained great tutorial. Cool.
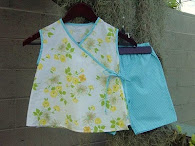
Great tutorial and just in time. I am making pajamas with pockets : ) I just bought some poster board too. I love the little shorts, even if they did get messed up somehow, adorable fabric!
Great tutorial! Thanks so much!
Skype is the best thing ever!!
SO nicely explained, thanks! I'll be linking.
I'm officially in love with you. Thanks a million - mine never look that good and now I know why. But I bet my next one will!
This is such a perfect tutorial... I'm definitely using it for my next pocket!! Thank you so much, sweet friend!
It looks like we have family in some of the same places... Hawaii and CA!
hope you're having a great week!
xo
m
lovely tutorial...I could follow it and mine still would not look like this! Oh and I heart Skype! xo t
Hey, that's a snazzy way of getting really neat, smooth rounded pockets! Thanks for sharing your tips!
I am linking to this post so I never, ever forget that this is right way to do this again!
I found you looking for info on sewing patch pockets-- need to put some on pants. Your tute is great! I will definitely be using it. Thanks!!!
when you are justing learning these things, it sure is nice that someone like you took the time to show the steps - no more brain racking for me. Thanks
Never thought of using cardboard!
Now I can sew rounded pockets too.
Appreciate the clear, easy to see/read photos/instructions. :)
Thanks for this great little tutorial! My patch pocket turned out beautifully!
Post a Comment